How To Make A Raised Garden Bed
Looking to transform your garden? Raised garden beds are an easy and affordable solution for you! It’s no wonder they’re so popular – not only will they take your garden to the next level, but they’re a great way to use leftover soil that you would normally put in a skip bin for soil removal!
To get you started, we have made an easy step by step guide on how to make a raised garden bed.
Overview
4 Benefits of a raised garden bed
1. Elevates your garden
A garden bed is a great DIY project to add some interest to your garden. They are both functional and stunning, and will look neat all year round!
2. Better for your back
Unlike a regular garden bed on the ground, you won’t need to bend over and kneel as much. Raised garden beds come in a range of different heights and sizes, so you can build the one that perfectly suits you.
3. Ideal for a vegetable garden
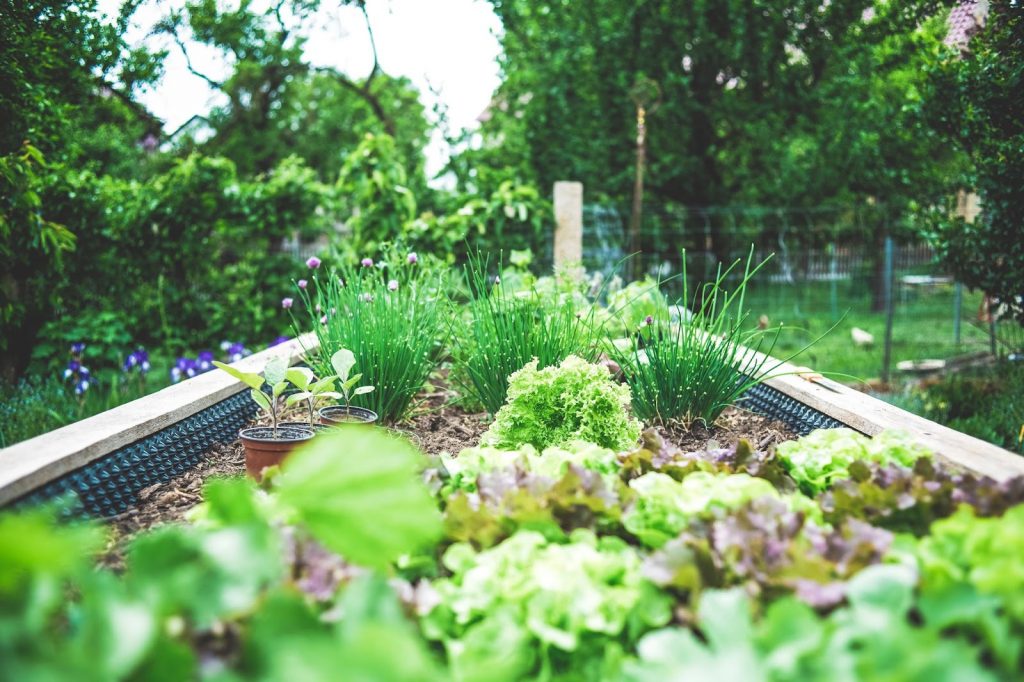
Raised garden beds are ideal for growing all sorts of vegetables and herbs! Because of how they’re made, the beds warm up quickly during spring and summer, and they also drain better. This gives you both a longer growing season and better growing conditions. Plus, it makes companion planting super easy too.
4. Control weeds and pests
Raised garden beds are perfect for keeping your plants away from critters and make it easy to control weeds. They’re also ideal if you have pets that like to dig holes in your garden!
Materials needed
The reason raised garden beds are growing in popularity is because they’re super affordable and easy to make. If you don’t have leftover materials, you will be able to purchase these materials from your local hardware store, and shouldn’t cost you more than $100.
If you have any leftover wood or other materials from old landscaping projects, Just Skips offers affordable landscape waste removal, so you don’t have to worry about disposing of them yourself.
This easy raised garden bed can be completed in an hour or less! All you need is:
- Two 2×12’ planks, approximately 2.6 metres long
- Two 2×12’ planks, approximately 1.2 metres long
- Twelve pieces of rebar wire
- Rubber mallet
- Wood chips or grass clippings
- Cardboard
- New garden soil
- Plants to fill the bed
How to make a raised garden bed from scratch
1. Choose your location
When choosing a location for your raised garden bed, you want to think about how much shade, sun and wind it will get. It also depends on what you want to grow. If you’re growing herbs you may need a location with full sun access, but if you’re planting vegetables, a place with moderate sun and shade is ideal.
2. Place your sides in position
Once you have chosen a suitable location with level ground for your planter box, you will need to place your wood sides into the correct position. Lay all your pieces of wood on the ground with the corners touching. Using your rubber mallet, hammer the rebar wire into the ground until 6 inches is exposed. Two pieces of wire should be hammered 30cm in from the corners on each side. For additional support, you can hammer the remaining 4 pieces of rebar wire to the centre of each side, until 6 inches is exposed from the ground.
3. Fill your garden bed
Using leaves, wood chips or grass, line the bottom of your frame so no spaces are visible. Then, place wet newspaper or cardboard on top of your chosen material. Fill it with soil until it reaches the top of the garden bed, with 3 inches of space remaining.
4. Add your plants
Now comes the exciting part – choosing what to plant in your raised garden bed! From root vegetables and herbs to statement flowers and beautiful plants, the possibilities are endless. But, there are a few factors that will impact what you can plant, such as the depth of your soil and the location.
If you have remaining garden waste such as grass, leaves, plants and branches – Just Skips are happy to take these off your hands. We offer easy-to-hire and affordable green waste skip bins.
Need help disposing of your landscaping waste?
If you’re still unsure how to dispose of any leftover waste, Just Skips are here to help with all your disposal needs with our skip bin hire in Adelaide. Choose between three sizes, including 4m³, 6m³ and 9m³. We offer affordable skip bin prices, starting from $250. Order a skip bin online today.
FAQs about how to make a raised garden bed
What do you put in the bottom of a raised garden bed?
There are plenty of materials you can use for the bottom of your raised garden bed. You can choose between a range of organic matter such as grass clippings, wood chips, leaves, straw or any other organic material for your first layer. To prevent weeds, place a final layer of wet cardboard or newspaper. This will eventually break down into compost.
What kind of wood should I use for a raised garden bed?
We recommend choosing either cedar, cypress or pine.
- Cedar: is a popular option for raised garden beds, due to its resistance to insects and rotting, and long lifespan.
- Cypress: Cypress is the most resistant wood compared to pine and cedar. This wood is sturdy and attractive, although can be quite expensive.
- Pine: If you’re looking to make a cheap raised garden bed, this is the perfect choice for you! Pine is highly affordable and easy to find, but not as rot resistant as other woods. Most gardeners will have to replace this wood within 5 to 6 years.
How deep should a raised garden bed be?
It all depends on what you would like to grow. But, to be effective, a raised garden bed doesn’t have to be very deep. We recommend building a raised garden to be either 10-15 inches deep, especially if you are wanting to grow vegetables.
For more information: How deep should your raised garden beds be?


